Come Creare un Certificato per IIS con più Hostname
 In alcuni casi potrebbe essere necessario creare un certificato (per IIS) che risponda a più Hostname (SAN certificate). Questo stesso certificato può essere utile anche per la parte Https di Exchange in quanto l’errore di “certificato” che appare sui client Outlook deriva dall’autodiscover Http e quindi è legato a IIS.
Per iniziare con la creazione di un certificato è necessario accedere via MMC alla consolle :
Click on Start – Run – MMC – File – Add/Remove Snap In – Select Certificates – Click Add – Select My Computer
Click on Personal – All Tasks – Advanced Operations – Create Custom request

- Click next in Certificate Enrollment Wizard’s welcome window
- Select “Proceed without enrollment policy” under Custom Request & click next
- In Custom Request window Select (No template) Legacy key & PKCS #10 as request format
- And Click Next

- In Certificate Information Page click the Details icon then Properties. It will open up Certificate Properties window, where we can define different attributes.

- Under Private Key, select key size. Over here I just left it as default. You may like to select 4096 for production servers.
- Under Key Type select “Exchange“

- Under Extension tab select Extended Key Usage; add Server Authentication from the available options.

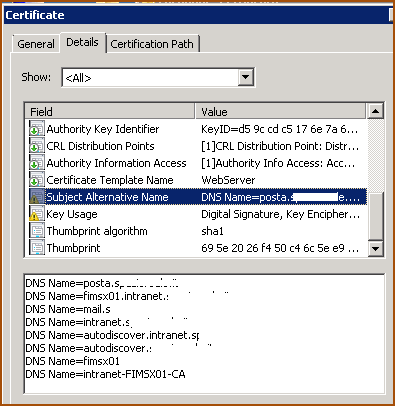
- Under Subject Tab we will be defining our multiple DNS names for the certificate
- From Drop down Subnet Name section select Common Name & type the value. Preferably the primary domain name & then click Add.
- Under Alternative Name select DNS type all alternate DNS Names & add them.

- Under General Tab type a friendly name.
- Better to keep add a * in front of the friendly name now. It will help you to bind the certificate from IIS graphical user interface to all websites using same IP & port 443. If you don’t do this now, no worries, you can do it later or you can use Commadline tool to bind this cert. I have discussed the same in certificate installation/import post.
- Click okay & In certificate information window click next

- Give a file path to save this certificate request 7 select Base 64 as file format

- It will generate “.req” file, you can open this file using notepad.
- You use this file to generate your SAN certificate from external public certificate authority or from your internal certificate authority server.
Guida Scaricabile QUI
Il tutto produrrà un file .Cer.DigiCertUtil
Per importare il certificato in IIS (dato che la richiesta non è partita da li) sarà necessario utilizzare un software come “digicert” (utility : > https://www.digicert.com/util/DigiCertUtil.exe). (QUI)
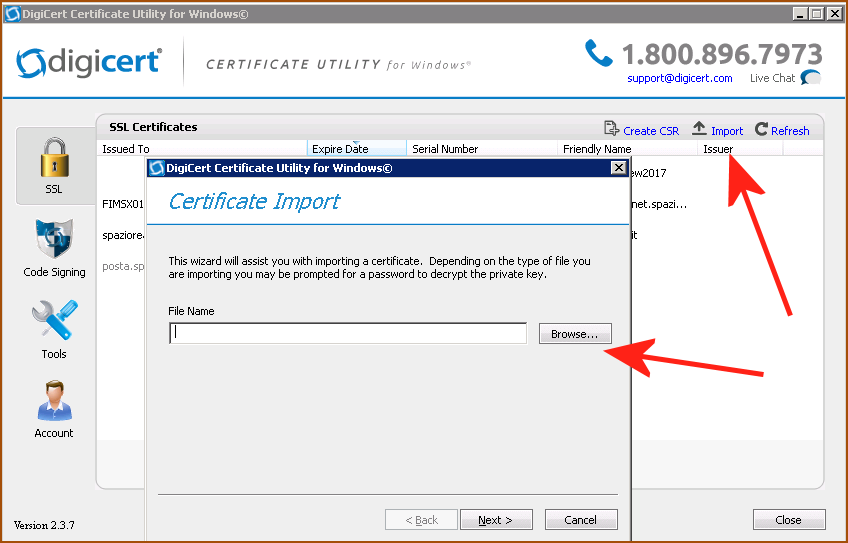
In questo modo il certificato verrà installato in IIS e sarà utilizzabile per essere “assegnato” a un Hostname HTTPS.
Installare certificato IIS, certificato Exchange, generare certificato IIS, certificato generare, multi hostname certificate, come generare un certificato multi DNS, hostname certificato, San Certificate IIS, certificato rinnovare Exchange, Exchange certificato
About the Author: Andrea Ceccherini
Subscribe
If you enjoyed this article, subscribe to receive more just like it.


Connect
Connettiti con me su vari social media...